A 9-inch round cake typically serves 12-16. Proper cutting ensures even slices. Use a sharp knife and spatula, and printable guides for uniform portions.
Importance of Proper Cake Cutting
Proper cake cutting ensures even distribution and maintains the cake’s presentation. It prevents uneven portions, crumbly slices, and waste. Even cuts make serving easier and more professional, enhancing guest satisfaction. A well-cut cake reflects attention to detail, making it a memorable part of any gathering. Whether for a celebration or event, precise cutting ensures everyone enjoys a visually appealing and delicious slice.
Overview of Tools and Techniques
To achieve precise and clean cuts, essential tools include a sharp chef’s knife, a cake spatula, and parchment paper. Techniques involve scoring the cake to guide cuts, using systematic slicing patterns, and printable guides for uniform portions. These methods ensure even distribution, minimal crumbs, and professional presentation, making the process efficient and stress-free for any gathering or event.
Tools and Preparation

Gather a sharp chef’s knife, cake spatula, and serving plate. Place parchment paper under the cake to catch crumbs, ensuring a clean and organized setup;
Essential Tools for Cutting
A sharp chef’s knife or serrated bread knife is crucial for clean cuts. A cake serving spatula aids in transferring slices. Use a sturdy cake plate or turntable for stability. Wax paper or parchment under the cake catches crumbs. Optional tools include a cake leveler for even layers and printable cutting guides for precise portioning. These tools ensure smooth, efficient cutting and professional-looking results.
Preparing the Cake for Cutting
Ensure the cake is completely cooled to prevent crumbling. Place it on a sturdy cake plate or turntable for stability. Remove any baking parchment from the bottom. For taller cakes, level them using a cake leveler or serrated knife. Lightly score the top with a knife to guide cuts. Placing wax paper or parchment around the cake catches crumbs, keeping the area clean. A clean, stable surface ensures precise, even slicing and maintains the cake’s integrity.
Basic Cutting Techniques
How to Achieve Even Slices
Score the cake lightly with a serrated knife, then cut evenly by dividing it into halves, quarters, and smaller portions. Use a cake stand for stability.
Start by scoring the cake lightly with a serrated knife to mark cutting lines. Cut the cake into halves, then quarters, and divide each portion into smaller, equal slices. For precision, use a cake stand or turntable to rotate the cake as you cut. Ensure each slice is 1-1.5 inches wide for uniformity. Using a ruler or guide can help maintain consistent widths, resulting in clean, even portions for all servings.
Step-by-Step Guide to Cutting
Place the cake on a sturdy stand or plate. Score the top lightly with a serrated knife to guide your cuts. Cut the cake in half, then into quarters. For smaller servings, divide each quarter into 3-4 equal slices. Use a ruler or cutting guide for precision. Rotate the cake as you cut to maintain evenness. Gently slide each slice onto a serving plate using a spatula. This method ensures clean, precise cuts and uniform portions for all guests.
Serving Size and Portion Control
A 9-inch round cake typically serves 12-16 guests with 1-inch wide slices. Adjust slice sizes based on event needs, using guides for uniform portions.
Calculating Servings for Different Gatherings
A 9-inch round cake typically yields 12-16 servings. For standard gatherings, slices can be 1-inch wide. To calculate precisely, start by cutting the cake in half, then into quarters. Each quarter can be divided into 3-4 slices, depending on desired portion size. Use a cake cutting guide or calculator to ensure uniformity. Printable guides are available online, offering diagrams for 12-32 portions. This method guarantees even distribution for any event size.
- Standard servings: 12-16 slices (1-inch wide).
- Larger events: Opt for smaller slices (0.75-inch wide) for up to 24 servings.
- Smaller gatherings: Wider slices (1.5-inch) yield 8-10 portions.
Use these techniques to match your guest count perfectly.
Adjusting Slice Sizes for Events
Adjusting slice sizes ensures the right portion for your event. For weddings or formal gatherings, aim for smaller, uniform slices (0.75-inch wide) to serve up to 24 guests. Casual events can use 1.5-inch slices for 8-10 servings. Use a sharp knife and cutting guide to maintain consistency. Simply divide the cake into quarters, then cut each quarter into 2-4 slices, depending on the desired size.
- Standard events: 1-inch slices for 12-16 servings.
- Smaller slices: 0.75-inch wide for 16-24 servings.
- Larger slices: 1.5-inch wide for 8-10 servings.
This flexibility ensures every guest enjoys a perfectly sized piece.
Advanced Cutting Methods
Advanced methods include event-style servings, scoring for even slices, and using guides for precise cuts. These techniques ensure clean, uniform portions, especially for taller cakes.
Cutting for Event-Style Servings
For event-style servings, measure 2 inches from the cake’s outer edge and cut inward. Score the cake lightly before slicing to ensure even portions. Use a sharp knife and spatula for smooth cuts. Printable guides can help achieve uniform slices. This method works well for taller cakes and ensures visually appealing, professional-style portions. It’s ideal for weddings or large gatherings, offering precise control over slice sizes and presentation. Always cut in a radial motion for clean, consistent results.
Creating Uniform Portions
To create uniform portions, score the cake lightly before cutting. Use a sharp knife to slice radially from the edge to the center. For even distribution, divide the cake into equal sections by measuring the circumference. This method ensures consistent slice sizes and visually appealing portions. A cake spatula aids in transferring slices cleanly. By following this technique, you achieve professional-looking results, perfect for events or gatherings, and maintain the cake’s integrity during serving.
Using Printable Cutting Guides
Printable guides simplify cutting a 9-inch cake into uniform portions. They outline precise measurements and angles, ensuring even slices for gatherings of any size and style.
Benefits of Printable Guides
Printable cutting guides offer precision and consistency when slicing a 9-inch round cake. They provide clear measurements and angles, ensuring uniform portions. These guides reduce waste and stress, making it easier to achieve professional-looking slices. Ideal for events, they help portion control and cater to varying serving sizes. Whether for home bakers or professionals, printable guides streamline the cutting process, ensuring every slice is evenly sized and visually appealing. They are versatile and adaptable to different cake heights and gathering needs.
How to Use Cutting Guides Effectively
To use cutting guides effectively, place the printable template on top of the cake, aligning it with the edges. Use a sharp knife to follow the marked lines, ensuring precise cuts. For event-style servings, measure from the outer edge and cut vertically. Guides adapt to cake heights and sizes, allowing uniform portions. They simplify portion control and reduce waste, making them ideal for events. Follow the guide’s measurements for consistent, professional-looking slices every time.
Special Considerations
When cutting taller cakes, use a serrated knife and level surface. For even slices, stabilize the cake and score before cutting. Adjust techniques for varying heights.
Cutting Taller Cakes
Cutting taller cakes requires precision and stability. Use a serrated knife and a level surface to ensure even slices. For cakes over 3 inches tall, cut in layers. Score the cake first, then make clean, vertical cuts. Stabilize with a cake stand or spatula. Slice from the bottom up for uniform portions. This method prevents crumbling and ensures consistent serving sizes, making it ideal for event-style servings or large gatherings.
Handling Different Cake Heights
Adjust slicing thickness based on cake height. Shorter cakes (under 3 inches) allow for thicker slices, while taller cakes (over 3 inches) require thinner cuts. Use a serrated knife for smooth cuts and a cake stand for stability. Score the cake before cutting to guide your knife. For layered cakes, cut each layer separately. This ensures even portions and prevents crumbling, making it ideal for both standard and event-style servings.

Tips for Clean and Precise Cuts
Use a sharp serrated knife and score the cake before cutting. Place parchment paper underneath to catch crumbs. This ensures clean, even slices and maintains cake integrity.
Ensuring Crumb-Free Slices
To achieve crumb-free slices, use a sharp serrated knife and score the cake before cutting. Place parchment paper under the cake to catch loose crumbs. Gently saw through the cake with even pressure, avoiding applying too much force. Use a serving spatula to transfer slices neatly. For extra precision, chill the cake slightly before cutting to firm the texture, ensuring clean, crumb-free results with each slice.
Maintaining Cake Integrity
Maintaining Cake Integrity
Ensure the cake remains stable during cutting by placing it on a sturdy cake plate or stand. Use a serrated knife to make gentle, even cuts, avoiding excessive pressure that could cause the cake to break. For taller cakes, consider inserting toothpicks or skewers near the top for added support. Always handle slices with a serving spatula to prevent breaking. Keeping the cake chilled before cutting can also help maintain its structure, ensuring clean, intact portions for serving.
Common Mistakes to Avoid
Common errors include using a dull knife, applying too much pressure, and cutting unevenly. These mistakes can lead to uneven slices and a damaged cake structure.
Pitfalls in Cake Cutting
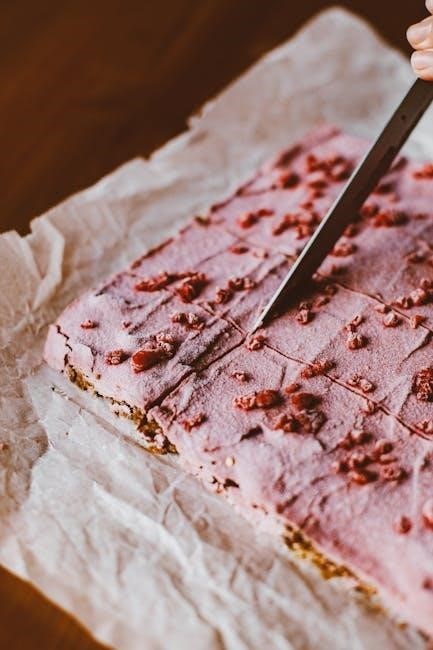
Common pitfalls include using a dull knife, applying uneven pressure, and not using a guide. These mistakes can result in uneven slices, crumbly edges, and a messy appearance. Overcrowding the knife with too much cake at once can also lead to tearing. Additionally, not allowing the knife to wipe clean between cuts can transfer crumbs and frosting unevenly. To avoid these issues, always use a sharp knife and consider a cutting guide for precise, clean slices every time.
Best Practices for Avoiding Errors
To avoid errors, use a sharp knife and ensure proper alignment before cutting. Measure the cake evenly and use a printable guide for uniform slices. Place the cake on a turntable for easier access to all sides. Wipe the knife clean between cuts to prevent crumbs from spreading. Apply gentle, consistent pressure and cut in a smooth, continuous motion. Avoid sawing back and forth, as this can tear the cake. For the best results, stabilize the cake on a flat surface before cutting.
Mastering the art of cutting a 9-inch round cake ensures even, attractive slices. Proper tools, techniques, and guides help achieve consistent results, making every serving memorable and satisfying.
Summarizing Key Points
Efficiently cutting a 9-inch round cake requires proper tools and planning. Start by halving the cake, then quartering it, and divide each section into smaller slices. For 12-16 servings, cut each quarter into 3-4 slices. Use a sharp knife and spatula to ensure clean cuts. Printable guides can help achieve uniform portions. Always consider cake height and use wax paper for crumb-free slicing. These strategies ensure even distribution and a professional presentation for any gathering.
Final Tips for Confident Cake Cutting
Final Tips for Confident Cake Cutting
For confident cake cutting, use a sharp knife and spatula to ensure clean, precise slices. Score the cake lightly before cutting to guide your knife. Use printable cutting guides for uniform portions. Plan the number of slices based on gathering size, and consider cake height when cutting taller cakes. Place the cake on a turntable for easier access, and use wax paper to catch crumbs. These tips will help you achieve professional-looking results every time.
