
The RG Colorado manual gear knob removal is a popular upgrade for enthusiasts seeking improved grip and personalization. It offers a straightforward yet detailed process for drivers aiming to enhance their driving experience with aftermarket solutions.
Overview of the Process
The process of removing the manual gear knob on an RG Colorado involves a series of careful steps to ensure a smooth and damage-free replacement. It begins with preparing the vehicle and accessing the gear knob, followed by detaching the stock knob using specialized tools. The procedure requires attention to detail, as the knob may be securely fitted or even non-removable in some cases. Challenges such as stuck or threaded knobs can arise, necessitating techniques like cutting or machining. Proper preparation and the right tools are essential to avoid damaging the gear stick or surrounding components. This guide provides a clear path for successful removal and installation of an aftermarket knob.
Tools and Materials Required
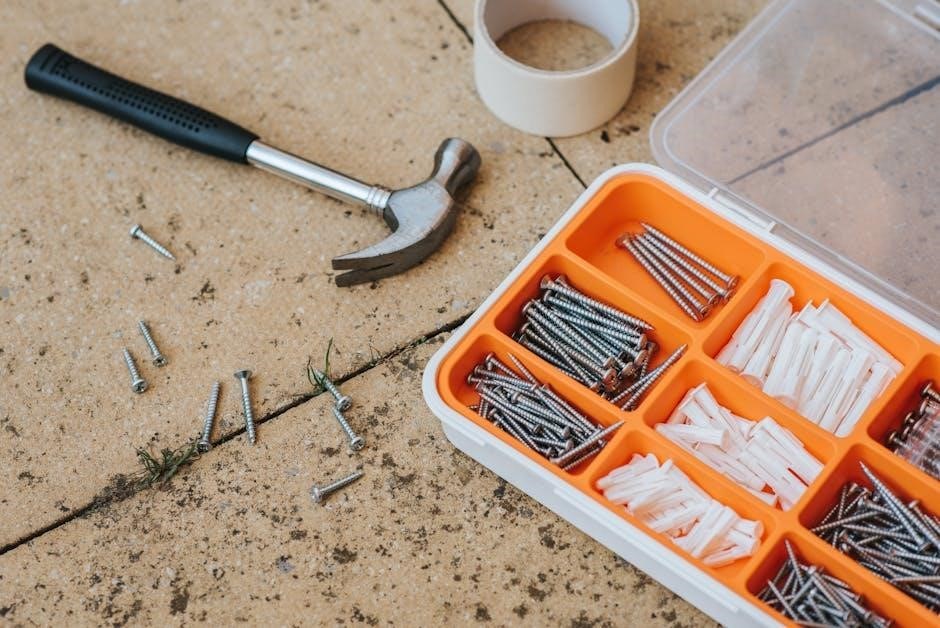
Essential tools include an Allen wrench, screwdrivers, and pliers. Materials like threadlocker and rubber grips are recommended for a secure and customized fit.
Essential Tools for Removal
The process requires specific tools to ensure a smooth and damage-free removal. An Allen wrench is crucial for unscrewing the gear knob from the shaft. Screwdrivers, both flathead and Phillips, may be needed to remove any additional screws or clips securing the knob. Pliers can assist in gripping the knob firmly, while a rubber mallet might be necessary for gently tapping the knob loose. For stubborn knobs, a specialized tool for threading or cutting may be required. Ensure all tools are readily available to avoid delays. Some tools might need to be purchased from a hardware store or auto parts supplier, especially if the knob is non-removable and requires cutting.
Recommended Materials
To ensure a successful removal, gather essential materials to prevent damage and simplify the process. A silicone-based lubricant or WD-40 can help loosen stubborn knobs. Protective gloves and eyewear are recommended for safety, especially if cutting tools are involved. A soft cloth or paper towels can clean residue and protect surfaces. If the knob is glued or epoxy-secured, adhesive remover may be necessary. For reinstallation, a torque wrench ensures proper tightening. Additionally, a threadlocker can secure the new knob firmly in place. These materials will help maintain the integrity of your vehicle and ensure a professional finish.
Step-by-Step Removal Guide
Start by loosening the knob using an Allen wrench or screwdriver. Gently pry or unscrew the knob, taking care not to damage the underlying gear stick mechanism.
Preparing the Vehicle
Begin by ensuring the vehicle is in park and the parking brake is engaged. Disconnect the battery to avoid any electrical interference. Locate the gear knob and inspect its attachment mechanism. Remove any trim or covers surrounding the gear stick for better access. If the knob is non-removable, consider cutting or drilling carefully to avoid damaging the underlying components. Take note of the gear stick’s alignment and position for proper reinstallation later. Gather all necessary tools, such as an Allen wrench or screwdriver, and ensure the area is clear of obstructions. This preparation ensures a smooth and safe removal process.
Accessing the Gear Knob
To access the gear knob, first remove the center console trim by gently prying it away from the dashboard. This exposes the gear stick and its mounting mechanism. For non-screw type knobs, you may need to carefully cut or drill around the base to detach it from the gear stick. Use a screwdriver or Allen wrench to loosen any visible fasteners. If the knob is stuck, apply gentle force or heat to break the adhesive bond. Be cautious to avoid damaging the gear stick or surrounding components during this process. Proper access is crucial for a successful removal and installation of an aftermarket knob.
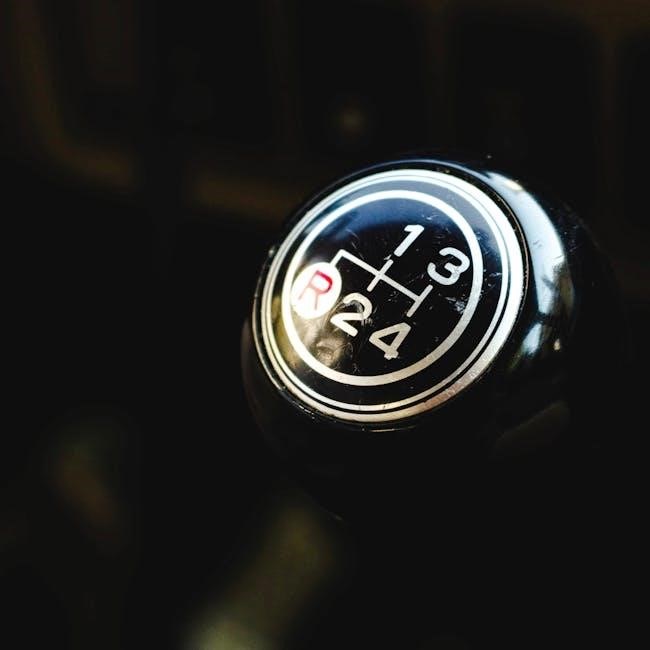
Removing the Stock Gear Knob
Begin by inspecting the stock gear knob to determine its attachment type. For screw-on knobs, use an Allen wrench to loosen and remove the retaining screw. For non-screw types, apply heat to soften the adhesive or gently pry the knob away from the gear stick. If the knob is stubborn, carefully use a screwdriver to create leverage, ensuring not to damage the underlying mechanism. Once loosened, pull the knob straight off. For knobby or glued-on types, cutting or drilling may be necessary. Be cautious to avoid damaging the gear stick during removal. Proper technique ensures a smooth transition for installing an aftermarket knob.
Challenges and Considerations
Removing the RG Colorado manual gear knob can present challenges, especially if it’s adhered or welded; Heat may soften adhesives, while cutting tools might be needed for welded knobs. Ensuring you have the right tools and techniques is crucial to avoid damaging the gear stick. Some cases may require replacing the entire gear stick if the knob is non-removable. Proceed with caution to maintain the shifting mechanism’s integrity. Consulting guides or forums for specific advice can help navigate these difficulties effectively.
Common Difficulties Encountered
One common difficulty is the knob being securely attached, requiring more than just unscrewing. Some knobs may be adhered or welded, making removal challenging without specialized tools. Heat tools can soften adhesives, while cutting tools might be necessary for welded parts. Another issue is the risk of damaging the gear stick or surrounding components. Improper techniques can lead to costly repairs, so careful planning and execution are essential. Additionally, some models may have non-removable knobs, requiring replacement of the entire gear stick. These challenges highlight the importance of thorough preparation and research before starting the removal process to ensure success and avoid complications.
Specialized Techniques
Specialized techniques are often required to remove the RG Colorado manual gear knob due to its unique attachment methods. Heat tools can be used to soften adhesives, while cutting tools like a Dremel or saw may be necessary for welded knobs. Applying penetrating oil and gently prying can help loosen stubborn connections. For threaded knobs, an Allen wrench or screwdriver might suffice, but welded or glued knobs may need more aggressive methods. Wrapping the gear stick with a cloth during removal can protect it from damage. If unsure, consulting a professional or following detailed tutorials is recommended to avoid costly repairs or damage to the transmission system.

Installation of Aftermarket Gear Knob
Installing an aftermarket gear knob on the RG Colorado enhances both style and functionality. Ensure compatibility with the vehicle’s make and model for a seamless fit and improved grip, offering a personalized driving experience.

Preparing the Gear Stick
Before installing a new gear knob, ensure the gear stick is clean and free of debris. Remove any remaining adhesive or residue from the previous knob using fine sandpaper or a solvent. Inspect the gear stick’s threading for damage or corrosion. If damaged, consider professional repair or replacement to ensure proper fitment. Apply a small amount of silicone-based lubricant to the threading for smooth installation. Proper preparation guarantees a secure and stable fit for the aftermarket gear knob, enhancing both functionality and aesthetics. This step is crucial for a successful upgrade.
Mounting the New Knob
Mounting the new gear knob requires precision and care to ensure a secure fit. Begin by aligning the knob with the gear stick, ensuring proper orientation and fitment. If the new knob is threaded, screw it onto the gear stick by hand until snug. For press-fit knobs, gently tap the knob into place using a soft mallet to avoid damage. Tighten any retaining screws or clips if provided. Avoid over-tightening, as this could damage the gear stick or knob. Test the knob by shifting through all gears to ensure smooth operation and stability. Proper mounting ensures reliability and enhances the driving experience.
The RG Colorado manual gear knob removal process is complete, with the new knob securely fitted. Test all gears to ensure smooth operation and proper engagement. Regularly inspect the installation to maintain reliability and performance. Follow manufacturer guidelines for any adjustments or maintenance. Enjoy the enhanced driving experience with your upgraded gear knob!
The RG Colorado manual gear knob removal involves preparing the vehicle, accessing the gear knob, and safely detaching it. Essential tools like an Allen wrench and materials such as gloves are recommended. Once removed, the stock knob is replaced with an aftermarket one, ensuring proper mounting and alignment. Common challenges include stubborn knobs and special techniques like cutting or machining threads. After installation, testing the gears ensures smooth operation. Regular inspections and following manufacturer guidelines maintain performance and reliability. This process allows for customization, enhancing both functionality and aesthetics, making it a worthwhile upgrade for drivers seeking personalized driving experiences.
Additional Advice
When removing the stock gear knob, ensure the vehicle is in neutral gear and apply the parking brake for safety. Use protective gloves to prevent hand injuries. After installation, test the new knob by shifting through all gears to confirm smooth operation. Regularly inspect the mounting for tightness to avoid looseness over time. For stubborn knobs, applying heat or penetrating oil can help ease removal. Consider consulting a professional if difficulties arise. Always follow manufacturer guidelines for aftermarket parts to maintain compatibility. Proper alignment and secure fitting are crucial for optimal performance. Keep the area clean to prevent debris interference. This ensures a durable and reliable upgrade, enhancing your driving experience.