
Singer Sewing Machines are renowned for their reliability and ease of use. They offer a range of models, from basic to advanced, supported by online manuals and thriving communities.
1.1 History of Singer Sewing Machines
Singer Sewing Machines have a rich history dating back to the mid-19th century, revolutionizing sewing with innovative designs. Founded in 1851, Singer became a household name, offering durable and user-friendly machines. The iconic Featherweight models from the 1950s remain popular among collectors. Singer’s commitment to quality and innovation has made it a trusted brand for generations of sewists, shaping the evolution of home sewing.
1.2 Evolution of Singer Sewing Machine Models
From mechanical to computerized, Singer sewing machines have evolved significantly. Early models like the Featherweight (1950s) emphasized portability and durability. Modern machines, such as the Heavy Duty series, offer advanced stitching options and automatic features. The transition from metal to plastic components in newer models has sparked debates about longevity. Despite changes, Singer remains a trusted name, blending tradition with innovation for sewists of all levels.
Safety Precautions and Best Practices
Ensure proper handling and maintenance to optimize performance. Be cautious with newer models’ plastic components. Avoid overloaded stitching to prevent damage and extend machine longevity.
2.1 Essential Safety Tips for Operating a Singer Sewing Machine
Always keep loose clothing and long hair tied back while sewing. Avoid distractions and ensure the machine is placed on a stable surface. Use the correct needle size for your fabric to prevent breakage. Keep children away and never touch moving parts. Regularly inspect the machine for damage. Follow the manual’s guidelines for oiling and maintenance to ensure smooth operation and longevity.
2.2 Handling Emergencies and Machine Malfunctions
In case of emergencies, immediately turn off the machine and unplug it from the power source. For malfunctions, refer to the user manual or online troubleshooting guides. If the machine jams, avoid forcing parts, as this may cause damage. Contact Singer customer support for assistance. Regular maintenance and proper handling can help prevent most issues. Always follow the manufacturer’s instructions for repairs.
Setting Up Your Singer Sewing Machine
Unboxing and initial setup involve placing the machine on a stable surface and ensuring proper power supply. Choose a well-lit, ventilated area for optimal sewing comfort.
3.1 Unboxing and Initial Setup
Start by carefully unboxing your Singer sewing machine, ensuring all accessories are included. Place the machine on a sturdy, flat surface in a well-ventilated area. Follow the Quick Start Guide to connect the power cord and prepare for first use. Familiarize yourself with the control panel and basic features before sewing your first stitch.
3.2 Choosing the Right Location for Your Sewing Machine
Place your Singer sewing machine on a stable, flat surface to ensure smooth operation. Choose a location with good lighting to enhance visibility. Keep the machine away from direct sunlight and moisture to prevent damage. Ensure the area is clear of clutter for easy access and optimal workflow. A dedicated sewing space helps maintain organization and focus while sewing.
Understanding Your Singer Sewing Machine
Understanding your Singer sewing machine involves familiarizing yourself with its key components and stitches. Learn about the power switch, spool pins, and stitch selectors to optimize performance.
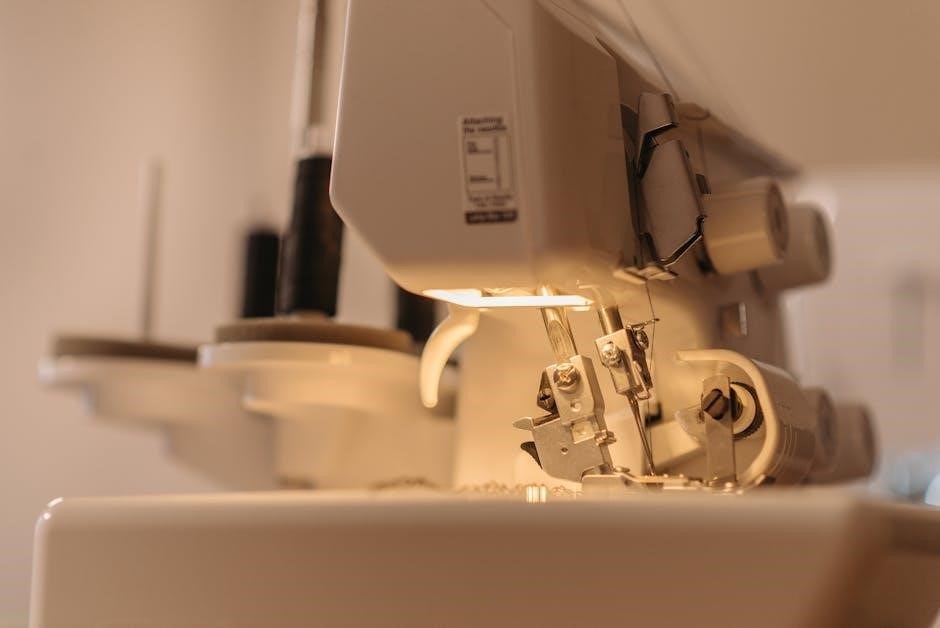
4.1 Identifying Key Parts and Components
Your Singer sewing machine features essential components like the power switch, spool pins, stitch selectors, and tension dials. The free arm provides easy access for sewing cuffs, while the presser foot helps guide fabric smoothly. Understanding these parts ensures proper operation and maintenance. Familiarize yourself with each element to enhance your sewing experience and troubleshooting abilities.
4.2 Understanding Stitch Types and Functions
Singer sewing machines offer various stitch types, including straight, zigzag, and decorative options. The straight stitch is ideal for general sewing, while zigzag is perfect for stretchy fabrics. Decorative stitches add creativity to projects. Adjusting stitch length and width tailors your work to specific fabrics and tasks. Understanding these functions enhances your sewing versatility and ensures professional-quality results.
Threading and Tensioning Your Machine
Proper threading and tensioning are crucial for smooth operation. Singer machines feature easy-to-follow threading guides, while tension adjustment ensures balanced stitches, preventing fabric pulling or looping issues.
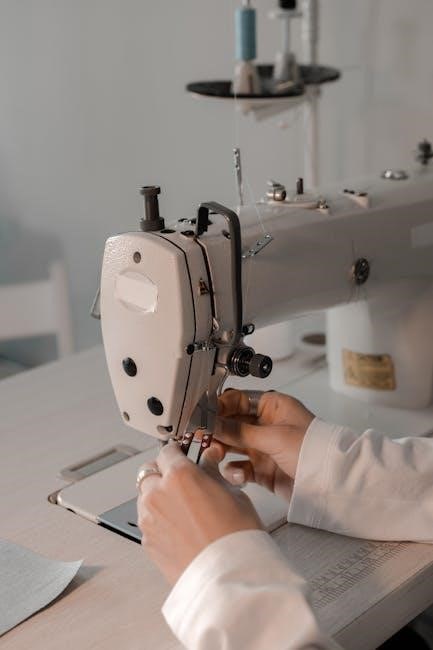
5.1 Step-by-Step Guide to Threading Your Singer Sewing Machine
Start by turning off your machine and locating the spool pin. Place the thread on the pin and guide it through the tension discs. Loop the thread around the take-up lever, then insert it through the needle. Gently pull the thread to set tension. Always refer to your Singer manual for model-specific guidance to ensure proper threading and optimal performance.
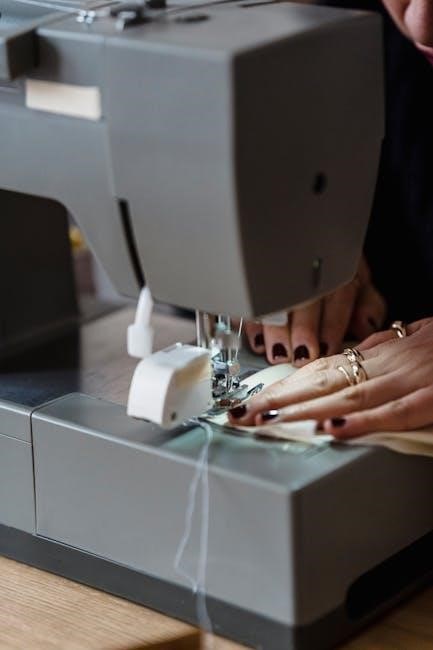
5.2 Adjusting Tension for Optimal Sewing Performance
Proper tension ensures even stitches. Adjust the upper thread tension by turning the dial on the machine. Test on scrap fabric and tweak as needed. The bobbin tension can be adjusted by turning the small screw on the bobbin case. Ensure balanced tension to avoid loose or tight stitches. Refer to your Singer manual for specific guidance on your model.
Selecting the Right Accessories
Essential accessories like zipper feet and walking feet enhance functionality. General-purpose feet are ideal for everyday sewing, ensuring versatility and efficiency for various fabric types and projects.
6.1 Essential Accessories for Singer Sewing Machines
Essential accessories for Singer sewing machines include various sewing feet like zipper, walking, and general-purpose feet. These enhance stitching accuracy and versatility. Additional must-haves are bobbins, needles, and thread take-up levers. Optional accessories like quilting guides and extension tables expand functionality. Always choose Singer-compatible parts to ensure optimal performance and longevity of your machine. Regularly updating your accessories helps maintain seamless sewing experiences.
6.2 Optional Accessories for Enhanced Functionality
Optional accessories like embroidery hoops, specialized sewing feet, and custom needles enhance your Singer machine’s capabilities. The Singer Start 1304, for instance, offers 57 stitch applications. Additional attachments, such as a blind hem foot or overlock foot, allow for professional-grade finishes. These accessories provide versatility, enabling users to tackle complex projects with precision and creativity, making them indispensable for advanced sewing enthusiasts.

Troubleshooting Common Issues
Common issues like thread breakage, machine jamming, or uneven stitching can be resolved by checking thread quality, ensuring proper tension, and cleaning the machine regularly.
7.1 Diagnosing and Solving Common Sewing Machine Problems
Identify issues by observing symptoms like uneven stitching or thread breakage. Check thread tension, ensure proper threading, and clean lint buildup. For machine jams, inspect for tangled threads or incorrect needle usage. Consult manuals or online guides for step-by-step solutions. Regular maintenance, like oiling and dusting, prevents many problems. Adjusting stitch length and width can also resolve common sewing issues effectively.
7.2 Resetting Your Singer Sewing Machine to Factory Settings
Resetting your Singer sewing machine restores default settings, often resolving software glitches. Locate the reset button, usually hidden in the machine’s compartment. Press and hold it for 5-10 seconds. Some models may require turning off the machine first. After resetting, refer to the manual or online guides to reconfigure settings according to your sewing needs. This ensures optimal performance and functionality.
Maintenance and Care
Regular maintenance ensures your Singer sewing machine runs smoothly. Clean the interior, oil mechanical parts, and check for wear. Follow manual guidelines for optimal longevity and performance.
8.1 Routine Maintenance for Longevity
Regular maintenance is crucial for extending the life of your Singer sewing machine. Clean the bobbin area and feed dogs to remove lint and debris. Lubricate moving parts as recommended to ensure smooth operation. Check and replace needles frequently to prevent damage. Refer to your manual for specific maintenance schedules and guidelines tailored to your machine model.
8.2 Cleaning and Lubricating Your Singer Sewing Machine
Clean your Singer sewing machine by gently brushing lint from the bobbin case and feed dogs. Use a soft cloth to wipe down exterior surfaces. Lubricate internal parts with Singer-approved oil, following the manual’s instructions. Avoid over-lubricating, as it can attract dust and cause issues. Regular cleaning ensures optimal performance and prevents mechanical problems, keeping your machine running smoothly for years.
Stitch Guide and Selection
Explore various stitch types, from basic to advanced, tailored for different fabrics and projects. Singer machines offer versatile stitch options to enhance your sewing creativity and precision.
9.1 Mastering Basic Stitch Patterns
Begin with essential stitches like the straight stitch, zigzag, and reverse. Singer machines simplify learning with clear settings and guides; Practice adjusting stitch length and width for optimal results. Start with basic projects to build confidence in handling different fabrics and techniques. These foundational stitches are versatile and essential for everyday sewing tasks, ensuring a solid start for any sewer.
9.2 Exploring Advanced Stitch Options
Advanced stitches like blind hem, stretch, and decorative patterns enhance your sewing capabilities. Singer machines offer a variety of these options, perfect for specialized fabrics and projects. Experiment with different settings to achieve professional finishes. Understanding when to use each stitch type expands your creative possibilities, allowing for intricate designs and tailored results. Always consult your manual or online guides for detailed instructions on advanced stitch applications.
Using Attachments and Feet
Attachments and feet enhance sewing precision and versatility. They stabilize fabrics, guide seams, and handle specialized tasks like zippers or buttons, improving overall results and efficiency.
10.1 Understanding Different Types of Sewing Feet
Various sewing feet are designed for specific tasks, such as zipper feet for precise zipper installation, walking feet for thick fabrics, and blind hem feet for invisible hems. Each foot is tailored to enhance control and accuracy, ensuring professional-quality results. Understanding and using the right foot for your project simplifies sewing and improves overall outcomes.
10.2 Attaching and Using Optional Sewing Feet
Attaching optional feet to your Singer machine is straightforward. Snap-on feet click into place, while screw-on types require a screwdriver. Always refer to your manual for specific instructions. Once attached, these feet enhance your sewing experience by providing stability and precision for tasks like quilting, embroidery, or heavy-duty sewing, ensuring your projects turn out flawlessly every time.

Upgrading and Customizing
Upgrading and customizing your Singer machine enhances performance and personalizes your sewing experience. Explore available upgrades and tailor your machine to meet specific sewing needs effectively.
11.1 Upgrading Your Singer Sewing Machine
Upgrading your Singer sewing machine can enhance its functionality and performance. Consider adding specialized feet, stitch guides, or motor upgrades for advanced sewing tasks. Visit Singer’s official website or authorized dealers to explore compatible upgrades. Ensure compatibility with your model before purchasing. Always follow the manufacturer’s installation guide to avoid voiding warranties and maintain optimal machine operation.
11.2 Customizing Your Machine for Specific Sewing Needs
Customize your Singer sewing machine to suit your sewing projects. Add specialized attachments like quilting extensions or Teflon feet for smooth fabric handling. Adjust stitch settings to match your fabric type, ensuring precise control. Utilize accessory kits designed for embroidery, quilting, or heavy-duty sewing to expand your creative possibilities and achieve professional results with ease and efficiency.
Resources and Support
Access Singer sewing machine manuals, guides, and updates online. Join sewing communities and forums for troubleshooting and creative projects, ensuring your machine runs smoothly and supports your sewing journey.
12.1 Accessing Singer Sewing Machine Manuals and Guides
Singer offers free downloadable PDF manuals for various models. Visit their official website or trusted third-party sites to find user guides, stitch charts, and troubleshooting tips. These resources ensure you can set up, maintain, and repair your machine effectively, keeping your Singer sewing machine in optimal condition for years of reliable service.
12.2 Finding Singer Sewing Machine Communities and Forums
Join Singer sewing machine communities and forums to connect with enthusiasts, share tips, and solve problems. These platforms offer valuable insights, tutorials, and support from experienced users and experts. Engaging with these groups enhances your sewing experience and helps you make the most of your Singer machine through collective knowledge and shared creativity.
Mastering your Singer sewing machine opens endless creative possibilities. Explore stitch options, maintain your machine, and join communities for inspiration and support. Happy sewing!
13.1 Maximizing Your Sewing Experience with Singer Machines
Maximize your sewing experience with Singer machines by exploring various stitch types, understanding your machine’s capabilities, and performing regular maintenance. Utilize online resources, manuals, and communities for tips and inspiration. Experiment with accessories and feet to enhance functionality. By mastering these elements, you can unlock creativity, improve efficiency, and enjoy a fulfilling sewing journey with your Singer machine.
13.2 Encouragement to Explore Creative Sewing Projects
Embark on creative sewing projects with confidence using your Singer machine. From simple repairs to intricate designs, explore tutorials and online communities for inspiration. Start with basic patterns and gradually experiment with advanced stitches and accessories. Engage with Singer’s resources and forums to discover new techniques and connect with fellow sewists, fostering a lifelong passion for sewing and creativity.