
Understanding thread guides is crucial; they ensure smooth fabric flow and prevent frustrating issues like thread slipping, as experienced by many sewers.
Proper threading, facilitated by these guides, directly impacts stitch quality and overall sewing machine performance, resolving most common problems.
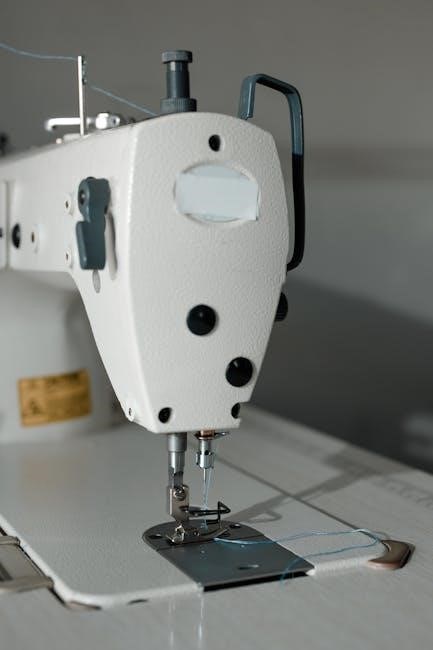
Visual resources, like stock illustrations, demonstrate the intricate paths thread takes, highlighting the importance of correct alignment for optimal results.
What are Thread Guides?
Thread guides are the unsung heroes of a smoothly operating sewing machine. They are small components, often metal loops or ceramic eyes, strategically positioned along the threading path. Their primary function is to direct the thread from the spool to the needle, maintaining consistent tension and preventing tangles.
These guides aren’t merely passive channels; they actively control the thread’s movement, ensuring it wraps correctly around the tension discs and engages properly with the take-up lever. Without them, the thread would likely bunch, break, or cause skipped stitches – issues many encounter when threading incorrectly.
As illustrated in various threading diagrams, these guides come in different forms, each serving a specific purpose in the overall threading process. Understanding their individual roles is key to mastering your sewing machine and avoiding common frustrations.
Why Proper Threading Matters
Correct threading, guided by the machine’s designated path, is paramount for achieving high-quality stitches and preventing a host of sewing problems. As one sewer experienced, consistently re-threading a needle due to slippage is incredibly frustrating and time-consuming.
Improper threading disrupts the delicate balance of thread tension, leading to issues like thread bunching underneath the fabric, skipped stitches, or even thread breakage during operation. These aren’t just inconveniences; they can ruin projects and damage the machine.
Essentially, the thread guides work in harmony to deliver the thread to the needle with the precise amount of tension needed for a secure and even stitch. Ignoring this process undermines the machine’s capabilities and wastes valuable time and materials.
Essential Components of a Threading System
Key elements include the spool pin, tension discs, and the take-up lever, working together to manage thread flow, as illustrated in exploded diagrams.
These components ensure consistent tension and proper thread delivery for flawless stitching.
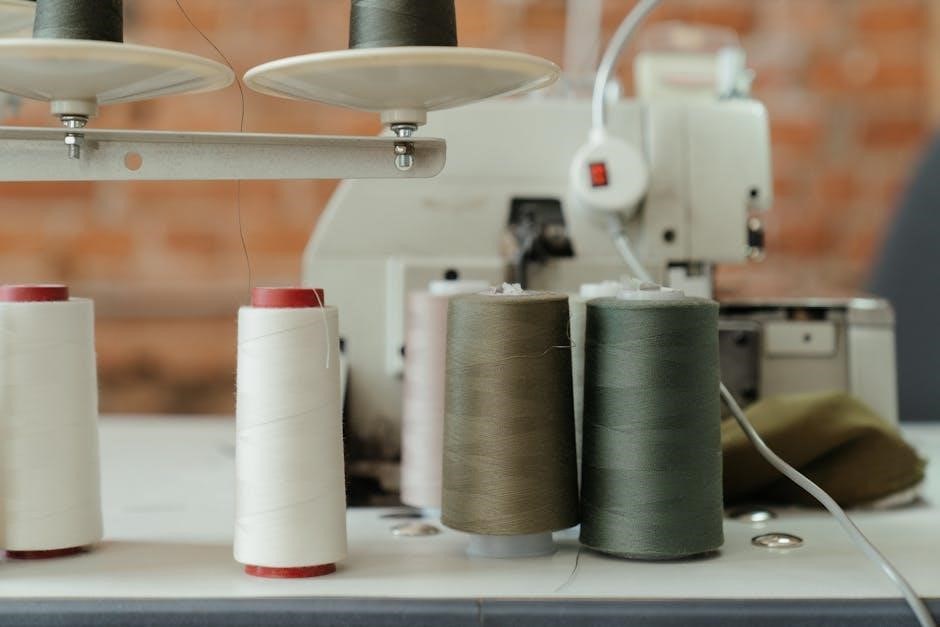
Spool Pin and Spool Caps
The spool pin is the starting point of the upper threading process, securely holding the thread spool in place. It prevents the spool from unwinding uncontrollably, ensuring a consistent thread feed. Spool caps are often used in conjunction with the pin; these small devices further stabilize the spool, especially when using larger or oddly shaped spools.
Different machines may have fixed or removable spool pins. Removable pins offer flexibility for vertical or horizontal spool placement. Proper spool placement is vital – thread should unwind smoothly, without jumping or tangling. Using a spool cap minimizes thread unraveling and keeps the thread flowing cleanly towards the first thread guide. Ignoring these components can lead to inconsistent tension and threading issues, ultimately impacting stitch quality.
Thread Take-Up Lever
The thread take-up lever is a crucial component in the upper threading path, responsible for controlling the thread’s tension as it forms a stitch. It moves up and down with the needle, pulling thread from the spool and feeding it to the needle. This action ensures that the correct amount of thread is used for each stitch, preventing looping or puckering.
Correct threading around the take-up lever is essential; the thread must loop around it properly to function correctly. Failure to do so can cause inconsistent stitch length and tension problems, similar to those experienced when thread slips from the needle. Observing the lever’s movement during sewing helps confirm proper operation. A malfunctioning take-up lever will significantly impact stitch quality and machine performance.
Tension Discs
Tension discs are a vital part of the sewing machine’s threading system, regulating the force applied to the thread as it’s drawn from the spool. They work by creating friction, controlling how tightly the thread is held, and directly impacting stitch balance. Proper tension is crucial for creating even, consistent stitches on various fabric types.
Threading correctly through the tension discs is paramount; the thread must be securely positioned between them. Incorrect threading can lead to loose or overly tight stitches, causing issues like thread bunching or skipped stitches. Adjusting the tension setting, in conjunction with correct threading, resolves many sewing problems. Maintaining clean discs ensures smooth thread flow and optimal tension control.
Step-by-Step Threading Process (Upper Thread)
Following a precise sequence, starting from the spool, through guides, tension discs, and the take-up lever, is essential for successful upper thread routing.
Accurate threading prevents common issues and ensures smooth operation, as highlighted by many sewing solutions online.
Step 1: From Spool to First Thread Guide
Begin by securely placing the spool of thread onto the spool pin, utilizing a spool cap to prevent it from unwinding haphazardly. This initial step is foundational for consistent tension throughout the threading process. Ensure the thread unwinds smoothly, in the correct direction as indicated by your sewing machine’s manual – typically counter-clockwise.
Next, guide the thread down to the first thread guide, often a small metal hook or loop positioned near the spool. This guide initiates the thread’s journey through the machine’s internal pathways. It’s vital to ensure the thread seats properly within this guide; a loose fit can lead to skipped stitches or inconsistent tension later on. Pay close attention to the path, as illustrated in diagrams or online tutorials, to avoid misrouting.
A common frustration is thread slipping off the spool or failing to engage with the first guide. Proper spool cap selection and careful thread placement are key to preventing these issues. Remember, a smooth, controlled start sets the stage for a successful threading experience.
Step 2: Through the Tension Discs
Following the first thread guide, the thread must navigate through the tension discs – a critical component for stitch quality. These discs control the amount of resistance applied to the thread, directly impacting the balance between the upper and bobbin threads. Ensure the thread passes between the discs, not just over them; this is a frequent error leading to tension problems.
Often, a small lever or knob needs to be lifted to create sufficient space for the thread to be positioned correctly. Lower the lever once the thread is seated, securing it between the discs. Incorrect tension can manifest as thread bunching or weak stitches, so precision is paramount. Refer to your machine’s manual for specific disc locations and adjustment instructions.
Troubleshooting often involves re-threading this section, verifying the thread is firmly nestled between the discs. Consistent tension is the goal, achieved through careful threading and occasional adjustments based on fabric type and thread weight.
Step 3: Around the Take-Up Lever
Next, the thread is guided around the take-up lever, a crucial element in the sewing machine’s threading path. This lever moves up and down with the needle, pulling thread from the spool and creating consistent stitch formation. Ensure the thread wraps fully around the lever, catching in the designated groove or hook.
Proper engagement is vital; if the thread slips off, stitches will be loose and uneven. Observe the lever’s movement during threading to confirm the thread is positioned correctly for consistent capture. Many machines have a specific direction for wrapping the thread – consult your manual.
A correctly threaded take-up lever ensures the right amount of thread is fed with each stitch, preventing bunching or breakage. Troubleshooting often involves re-threading this step, verifying the thread’s secure placement around the lever.
Step 4: To the Needle Threader (if applicable)
If your sewing machine features a needle threader, this step simplifies a potentially frustrating process. Guide the thread through the designated slot or hook of the threader mechanism, following your machine’s specific instructions. This often involves holding the thread in place while activating the threader.
The threader will automatically pull the thread through the eye of the needle, saving time and reducing eye strain. However, not all machines have this feature, and manual threading is still necessary in those cases; Ensure the threader is engaged correctly before attempting to thread the needle.
If the threader fails to work, double-check the thread’s placement and the mechanism’s functionality. Sometimes, a slight adjustment or re-threading is all that’s needed.
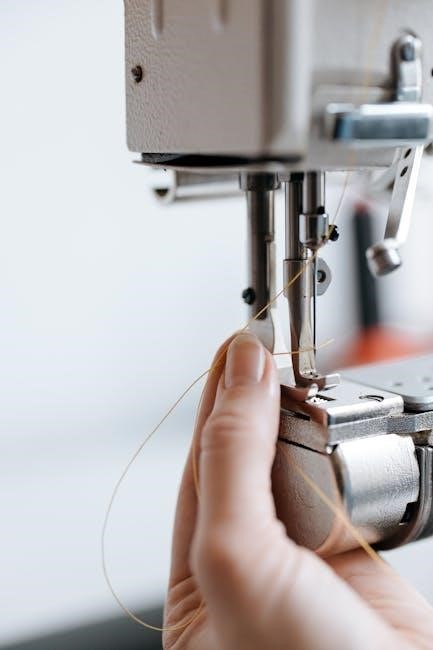
Step 5: Threading the Needle
With the thread now guided through all preceding components, the final step is threading the needle’s eye. This can be challenging, especially with fine threads or for those with limited dexterity. If you used a needle threader, this step is already complete!
Otherwise, hold the thread taut and carefully push the end through the needle’s eye, moving from front to back is generally easier. A well-lit workspace is crucial for visibility. Many sewers find a needle threader invaluable, preventing frustration and saving time.
Ensure sufficient thread extends beyond the needle – approximately 3-4 inches – for smooth sewing. A properly threaded needle is essential for consistent stitch formation and preventing thread breakage.
Step-by-Step Threading Process (Bobbin Thread)
Bobbin threading involves winding the bobbin, inserting it correctly, and drawing up the thread; crucial steps for balanced stitches and proper fabric formation.
Winding the Bobbin
Begin by placing the thread spool on the spool pin, securing it with a spool cap to prevent unraveling during the winding process. Next, guide the thread through the designated thread guides specifically for bobbin winding – these often differ from those used for the upper thread.
Ensure the thread wraps evenly around the bobbin core; many machines have a tension disc specifically for bobbin winding, adjusting this is vital. Engage the bobbin winder mechanism, typically by pushing it to the side. Start the machine slowly, allowing several wraps to build up before increasing speed.
Monitor the bobbin as it winds, stopping when it’s nearly full to avoid overflow. Disengage the winder and trim the thread, leaving a tail for easier insertion. Consistent winding ensures even tension, preventing issues during sewing, as proper threading solves most machine problems.
Inserting the Bobbin
The method for inserting the bobbin varies significantly depending on your sewing machine type – front-loading or top-loading. For front-loading machines, open the bobbin case and carefully insert the bobbin, ensuring the thread unwinds in the correct direction, guided by the illustrated diagram.
Thread the thread through the tension slot in the bobbin case; this is crucial for proper tension. For top-loading machines, drop the bobbin into the bobbin holder, again observing the correct thread direction. Guide the thread through the designated thread path, often involving a small metal guide.
Ensure the thread is properly seated in the tension mechanism. Correct bobbin insertion, guided by the machine’s threading path, is fundamental to avoiding thread bunching and skipped stitches.
Drawing Up the Bobbin Thread
After inserting the bobbin correctly, you must draw up the bobbin thread to begin sewing. Hold the upper thread loosely and slowly turn the handwheel towards you, one full rotation. This action should catch the bobbin thread and bring a loop up through the needle plate.
Use a pin or the tip of your scissors to gently pull the bobbin thread loop upwards. Carefully pull both the upper and bobbin threads towards the back of the machine, under the presser foot. Proper engagement of both threads is vital for forming a balanced stitch.
Confirm both threads are extending evenly towards the back before starting to sew, preventing tangled messes and ensuring a clean stitch formation.

Common Threading Problems and Solutions
Incorrect threading is often the root cause of sewing issues, like bunching or skipped stitches, demanding careful attention to thread guides.

Addressing these problems usually involves rethreading both upper and bobbin threads, ensuring proper engagement at each guide point.
Thread Bunching Underneath Fabric
Thread bunching beneath the fabric is a common frustration, frequently stemming from improper threading through the machine’s guides. This issue indicates the upper thread isn’t properly engaging the bobbin thread, leading to a tangled mess on the underside of your project.
Often, the problem lies in a missed or incorrectly positioned thread guide. Carefully retrace the threading path, ensuring the thread smoothly navigates each guide, tension disc, and the take-up lever. A slight deviation can disrupt the delicate balance needed for proper stitch formation.
Check that the thread isn’t snagging on any part of the machine during its journey. Sometimes, a burr or rough edge near a guide can cause the thread to jump off course. Consistent, correct threading is key to preventing this frustrating problem and achieving clean, professional-looking seams.
Skipped Stitches Due to Incorrect Threading
Skipped stitches often signal an issue with the upper thread’s path, particularly its interaction with the thread guides. If the thread isn’t correctly seated within these guides, it can lose tension, preventing it from properly forming a loop around the bobbin case.
Ensure the thread is fully engaged in each guide along the threading path, from the spool to the needle. A common mistake is allowing the thread to jump over a guide instead of passing through it. This disrupts the controlled tension required for consistent stitch formation.
Re-threading the machine, paying close attention to each guide, is the first step in resolving this issue. Correct threading guarantees the thread is delivered to the needle with the appropriate tension, eliminating skipped stitches and ensuring a flawless sewing experience.
Thread Breaking During Sewing
Frequent thread breakage can indicate a problem with the thread’s journey through the machine, often stemming from friction within the thread guides. A rough or damaged guide can abrade the thread, weakening it and causing it to snap under tension.
Inspect each thread guide for burrs, sharp edges, or accumulated lint. Even a small imperfection can create enough friction to compromise the thread’s integrity. Cleaning the thread path and ensuring smooth surfaces are vital.
Incorrect threading, where the thread is forced or twisted through a guide, also contributes to breakage. Gentle, direct threading minimizes stress on the thread, preventing premature failure and ensuring a continuous, uninterrupted sewing process.
Needle Threading Difficulties
Struggling to thread the needle often signals an issue before the needle itself. Improper thread guidance upstream can cause the thread to fray or become twisted, making it impossible to pass cleanly through the needle’s eye.
Ensure the thread is properly seated in each thread guide leading to the needle. A thread that jumps or isn’t fully engaged in a guide creates tension and distortion, hindering smooth passage.
Check for lint or debris obstructing the thread path. Accumulated fluff can build up, creating friction and preventing the thread from flowing freely. A clean, unobstructed path simplifies needle threading significantly.

Different Sewing Machine Types & Threading Variations
Threading paths vary significantly between machine types – front-loading, top-loading, and sergers – requiring adjustments to thread guide engagement for optimal performance.
Understanding these differences ensures correct thread flow, preventing issues related to specific machine designs and their unique guide systems.
Threading a Front-Loading Bobbin Machine
Front-loading bobbin machines present a unique threading challenge due to the bobbin’s placement. Begin by guiding the thread from the spool, utilizing the spool pin and cap to control unwinding. The thread then proceeds through a series of guides, often including a preliminary guide near the spool and another positioned before the tension discs.
Crucially, ensure the thread snaps firmly into each guide; failure to do so can cause skipped stitches or uneven tension. After navigating the tension discs, the thread loops around the take-up lever, a vital component for consistent stitch formation. From there, it’s directed towards the needle threader (if equipped) and finally, threaded through the needle’s eye.
Pay close attention to the specific path illustrated in your machine’s manual, as variations exist between models. Correctly utilizing these thread guides is paramount for smooth operation and preventing common threading frustrations.
Threading a Top-Loading Bobbin Machine
Top-loading bobbin machines simplify bobbin access, but still require precise threading. Start by guiding the thread from the spool, securing it with the spool pin and cap. The thread then follows a defined path through several thread guides, ensuring controlled movement towards the tension mechanism.
Unlike front-loaders, the thread path often includes a guide specifically directing the thread down towards the bobbin area. After the tension discs, the thread loops around the take-up lever, essential for balanced stitch creation. It then proceeds through a final guide before reaching the needle.
Carefully follow your machine’s manual for the exact threading sequence, as slight variations exist. Proper use of these guides prevents issues like thread bunching and ensures consistent, high-quality stitches.
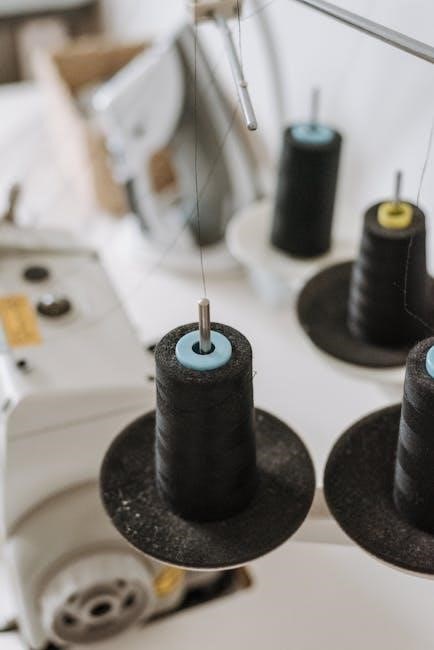
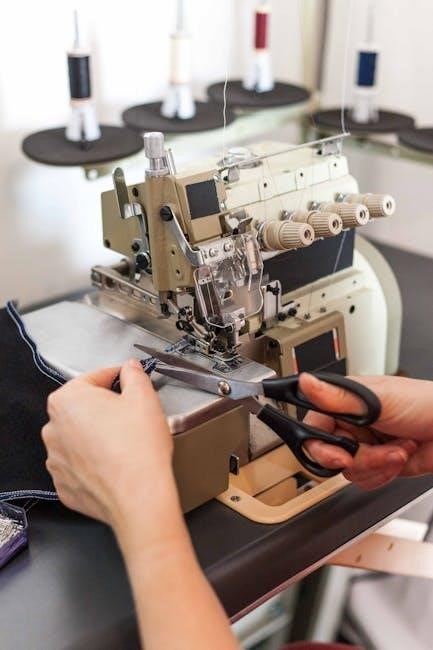
Threading an Overlock/Serger Machine
Overlock, or serger, machines present a more complex threading challenge due to their multiple threads. Each thread—typically 3 to 5—follows a dedicated path, utilizing numerous thread guides to ensure correct tension and loop formation.
Color-coding is often employed to differentiate each thread path, simplifying the process. The thread travels from the spool, through tension discs specific to that thread, and then through individual thread guides strategically positioned around the machine.
These guides direct the thread towards the loopers and knives, crucial components for creating a professional, finished edge. Precise threading is paramount; even slight errors can lead to skipped stitches or uneven seams. Consult your machine’s diagram meticulously.

Maintaining Your Threading System
Regular cleaning of thread paths removes lint and debris, ensuring smooth thread flow through the guides. Inspect guides for burrs or damage, preventing thread breakage.
Regular Cleaning of Thread Paths
Consistent cleaning is paramount for a smoothly functioning threading system. Lint, dust, and stray thread fibers accumulate within the thread guides, creating friction and hindering the thread’s movement. This buildup is a primary cause of tension issues and skipped stitches.
Use a small brush, like a toothbrush or a specialized sewing machine cleaning brush, to gently dislodge debris from each guide. Compressed air can also be effective, but use it cautiously to avoid forcing particles deeper into the machine.
Pay particular attention to areas where the thread changes direction or passes through tight spaces. A clean path ensures consistent thread delivery, contributing to even stitch formation and preventing frustrating interruptions during your sewing projects. Regular maintenance extends the life of your machine!
Checking for Burrs or Damage
Regularly inspect your sewing machine’s thread guides for any signs of wear, burrs, or damage. These imperfections can snag the thread, causing breaks, tension problems, and ultimately, skipped stitches – a common frustration for sewers.
Run your fingertip carefully along the surface of each guide; even a tiny burr can disrupt the thread’s flow. Examine the guides closely for cracks or chips, especially those made of metal or plastic.
If damage is detected, replace the affected guide immediately. Ignoring these issues can lead to more significant problems within the threading system and potentially damage the machine itself. Proactive inspection saves time and ensures consistent sewing quality.
Resources for Further Learning
Explore online tutorials and videos for visual guidance on threading and troubleshooting. Always refer to your sewing machine’s manual for specific instructions!
Online Tutorials and Videos
Numerous platforms host excellent sewing machine threading tutorials. YouTube is a fantastic resource, offering a wealth of videos demonstrating threading for various machine models. Search specifically for your machine’s brand and model number to find the most relevant guidance.
Websites dedicated to sewing, like those offering online classes, often include detailed video demonstrations of threading procedures. These resources frequently cover both upper and bobbin threading, addressing common issues and providing clear visual aids.
Consider searching for videos that focus on specific threading problems, such as thread bunching or skipped stitches, as these often pinpoint issues related to incorrect thread guidance. Visual learning can be incredibly effective when mastering this skill!
Sewing Machine Manuals
Your sewing machine’s manual is the definitive guide to its threading system. It provides diagrams specifically tailored to your model, illustrating the correct path for the thread through all guides and tension mechanisms.
Pay close attention to the manual’s illustrations of the thread path, noting the order in which the thread must pass through each guide. These diagrams are crucial for avoiding common threading errors.
Many manuals also include troubleshooting sections that address threading-related problems, such as skipped stitches or thread breakage. Refer to these sections if you encounter difficulties. Don’t discard your manual; it’s an invaluable resource!